Approximately Up Planets & Map Guide
Earth, Moon, stations, gravity, and atmosphere — what changes per world.
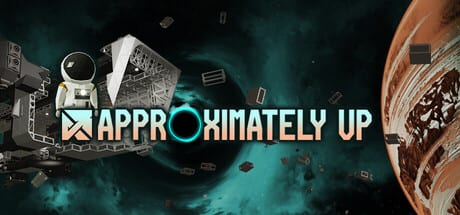
Approximately Up is structured as a slow expansion across a planetary system: you begin on Earth, unlock Planet Stations as permanent garages, and push outward to worlds with different gravity, atmosphere, temperature, and visual hazards (oceans, clouds, thick air). Ship designs that work at home often fail one hop later if you ignore those differences. This guide explains the map philosophy, starting worlds, and how environment stats should drive thruster and sensor choices.
How the map works
You are not warping from a menu. You fly between bodies using ships you build at stations. Each planet typically offers one or more Planet Stations — landing pads with build zones and mission boards. First landing unlocks a station permanently, turning it into a new launch point for future routes.
That loop creates a literal map made of nodes (stations) and edges (routes you can fly). The objective log (press O) points you toward missions that encourage visiting new nodes. Over time your network looks like a spiderweb of garages rather than a linear campaign level select.
Demo players explore a large fraction of the system described in Steam marketing (15 unique planets in store copy). The full release targets 17 planets — see Demo vs full release for scope timing.
Earth — tutorial gravity, full atmosphere
Earth is the default starting world: familiar gravity, dense atmosphere, and forgiving terrain for first crashes. Atmospheric thrusters operate at full efficiency here — they are S-tier for liftoff. Electric thrusters are not your launch workhorse on Earth unless you are experimenting.
Earth stations teach:
- Frame construction and cable routing
- Atmospheric climb and basic RCS orientation
- First delivery missions that unlock electric thrusters and advanced logic
Recommended instruments: velocity meter, altimeter, radar before long trips — see Sensors tier list. Run Thrust calculator with Earth gravity before hauling mission cargo.
Moon — low gravity, vacuum landing discipline
Earth’s Moon (and moon-like bodies in the roster) pushes vacuum propulsion and RCS-heavy landings. Atmospheric thrusters do nothing in vacuum; electric thrusters carry vertical burns. Community demo strategy mounts two electric thrusters vertically on center of mass, uses RCS tilt to point, and pulses vertical thrust to translate — similar to historical lunar lander profiles.
Moon differences that matter:
| Factor | Earth | Moon (typical) |
|---|---|---|
| Gravity | High | Low |
| Atmosphere | Dense | Thin (atmospheric thrusters work low and slow) |
| Primary thrust | Atmospheric | Electric + atmospheric low-altitude |
| Landing style | Aerodynamic + retro | Pulse + RCS |
| RCS wear | Moderate | High on long approaches |
Pack spare RCS blocks or wired maneuvering thrusters for multi-minute approaches. Dampers help touch-down without snapping legs. Use atmospheric thrusters for low-altitude lunar skims — a common demo surprise covered in the Moon Landing Guide.
Oldara and Fred’s Star (demo finale)
Oldara appears in the Fred’s Star demo finale added June 6, 2026 — Fred’s failed wormhole experiments, dead water-world biomes, and a descending blue star threaten the whole system. Mission flow uses scanner/tower objectives rather than simple pad delivery. Read Fred’s Star finale before flying there; bring Radar and co-op roles if possible.
Sun, black hole, and sandbox routes
The system map includes a Sun and a black hole behind it — optional exploration, not required for Moonstep progression. Community pilots use trajectory curvature meters and velocity integrators to avoid direct Sun headings (ships heat-break around 330 million meters on straight Sun lines). Treat these as advanced sandbox goals; full release may expand hazards on later planets.
Planet Stations as checkpoints
Stations are more than lore markers:
- Build zone — assemble or repair ships without returning to Earth.
- Mission hub — pick deliveries, experiments, and unlock rewards locally.
- Fast travel anchor — once unlocked, you can launch from there forever.
When planning a route, ask: If I crash halfway, where is the nearest unlocked station? Early players chain Earth → nearby moons → back to Earth for parts. Mid-game players leave specialized hulls parked at stations (atmo-only skimmers vs vacuum tugs) instead of one-ship-for-all.
Gravity and ship design
Higher gravity increases weight for the same mass, lowering TWR unless you add thrust or shed blocks. Low gravity forgives heavy frames but makes fine control harder — small RCS taps overshoot.
Rules of thumb:
- High-gravity worlds — prioritize thrust margin and sturdy dampers; avoid decorative window spam.
- Low-gravity moons — prioritize RCS symmetry and electric vertical thrust; atmospheric parts are dead weight.
- Mixed routes — hybrid ships or station-stored swaps beat single designs.
Always recalc TWR when jumping between worlds; Moon success does not imply outer-planet success.
Atmosphere and thruster selection
Atmospheric density determines whether atmospheric thrusters produce meaningful force. Thick atmospheres favor them for takeoff and skim flight. Vacuum legs require electric or future fuel engines teased for full release.
Cloud layers and weather visuals can block sight lines — radar jumps to S-tier on cloudy planets. Ocean worlds raise questions about surface landing vs station pads; scan mission text and use external cameras when previewed in full release.
Cross-reference Thruster tier list before committing to a one-atmosphere ship for a multi-planet campaign.
Temperature and special hazards
Steam marketing highlights temperature and exotic mission payloads — experimental power sources, heavy submarines, ticking crystals. Planets with extreme temperature may push heat-resistant frames and power cooling in the full game. Demo players already see mission variety that stress-tests thrust and cabling; expect harsher biomes on later planets.
Treat hazard text in missions as map metadata: if a world hosts “unexpected power outages mid-flight,” pack redundant batteries and simplify logic.
Soundtrack and exploration flavor
Each planet ships with a dynamic soundtrack reacting to exploration beats — not a mechanics stat, but a cue that you entered a new biome worth scouting. Use audio shifts as feedback that your ship crossed into different design territory (thicker air, open vacuum, ocean glare).
Building your personal map
Keep a simple player journal (or co-op shared doc):
- Station unlock order
- Gravity/atmosphere notes per stop
- Which hull is parked where
- Mission rewards unlocked at each node
Wiki pages cannot replace your save-specific network, but Updates will add named planet entries as dataminers and explorers publish verified details post-launch.
Route planning checklist
- Start gravity and atmosphere known?
- Vertical TWR acceptable on departure world?
- Vacuum thrust planned for vacuum legs?
- Radar/altimeter visible to pilot?
- Nearest backup station identified?
- Co-op roles assigned — Co-op guide
Related pages
- Demo vs full release — 15 vs 17 planets
- Tier list hub — parts per environment
- Getting Started — first objectives on Earth
- Links — official announcements for new planet reveals
The map is the meta-progression layer in Approximately Up. Master Earth and the Moon, then read each new world’s stats before you bolt on the same thrusters — the galaxy is built to break copy-paste ships.
Frequently Asked Questions
Quick answers to the most common questions.
Where do I start in Approximately Up?
On Earth, with access to Planet Stations that unlock permanently when you land on them.
Why does my ship fly on Earth but not on the Moon?
Atmospheric thrusters need air; the Moon requires electric or other vacuum thrust plus different TWR in low gravity.
How many planets are there?
Store copy highlights 15 unique planets; the full release targets 17. See Demo vs full release for details.